Showing posts with label notbitching. Show all posts

Saturday, January 23, 2016

RG's workshop: Record crate

I have an old wooden crate that is the perfect size for holding records, but unfortunately with garage sales and whatnot, one crate is no longer enough to hold my record, ahem, "collection".

It occurred to me last year that I could make my crate own out of the LADE boards that come from bed slats, and which are so useful for many projects, including the 90-minute glove rack and the long things holder I briefly mentioned in my last post. I took photos during the process and I'm finally getting around to posting about it.

It starts with isolating the wooden slats from the cloth straps that are stapled into them to keep them together while in use as a bed. First I separate the cloth from the slat by grabbing it with needle-nose pliers and rotating them.


Sometimes the staple comes out with the cloth, otherwise it just sort of bulges. This usually gives enough room to clamp some locking pliers onto the staple and rotate the pliers to remove the staple nice and cleanly:


Here's the schematic I drew for myself after figuring out how to get the various pieces I needed from 26" long Lade boards in order to get a crate that is roughly the same dimensions as my antique one, i.e. 17.5" by 9" and tall enough to hold 12" records.


I marked the boards for the 9" slats that go on the ends of the crate. The longer component is for the side and bottom slats, and they're screwed on the outside so they can vary slightly, but the 9" ones are screwed on their ends so need to be a consistent length. (You can also see the first draft of my figuring out)


Here I'm cutting the pieces with a mini handheld circular saw I bought. This is the only power tool I've bought (I inherited my drill and not counting the Dremel or heat gun) and though I'm more comfortable using hand tools since that's what I used growing up, being able to cut a board in two seconds with very little effort is very useful.


Cutting the boards lengthwise is even harder with a hand saw (and I've done it before for the side pieces on my laptop box). Since the circular saw has a plate that would bump into any clamps I tried to use on the lengthwise cut, I screwed the board onto a longer, sacrificial board from underneath and clamped that one down.

The lengthwise-cut pieces form the corner bits that hold everything together. Here I've tied (using the straps pulled off of the Lade boards) the end pieces to the corner bits to mock them up and see how well things will fit together.


Another reason I needed to mock it up was to see how I wanted to arrange the slats. In my diagram I had a hole cut out of the end boards, but I realized that I could just omit the second-highest board and the top board naturally becomes a handle.

Here I'm lining up the screws in the corner bit to match up with the end pieces (I'm too impatient to bother with glue and still wasn't sure how or if everything might come together). The screw heads will be covered over later by the long side slats. I had already screwed the other end together, and because it's used wood that is slightly warped, I needed to clamp two boards onto this end to make them straight for inserting. In retrospect, the screws for the lowest end slat should have been higher up in order to allow more room for the ones that will be screwed in from the bottom for the bottom slats.


Edit: After posting this blog entry, I discovered a photo of a second crate I had started to build which I had forgotten. I pre-drilled this set of holes in the pieces before making the linear cut to assemble the corner bits. Unfortunately, I didn't think to have the holes for the bottom piece a bit higher. You can see how the pieces are screwed to a longer board that I can clamp down during the long cut (I had removed the top piece for this photo to show how they were both attached). After going back to verify that I hadn't finished a second one, I found the piece still there, waiting to be sliced in half. I might actually dismantle it again and pre-drill the diagonal holes for the long side pieces too before cutting it.


Here are the first two bottom slats being affixed to the assembled ends. The alignment was a bit off, but nothing a little forcing can't fix. I offset the screws that attach to the corner bits so as not to conflict with the screws I'd just inserted, before I realized that I'd also need to drill holes through where these screws go for the side slats! I don't remember exactly how I addressed this (and I'm not going to empty it out now and turn it upside down), but it's not the end of the world.


Here's the side view, after attaching all the bottom boards. The slat at the bottom of the picture is the top slat and I installed it first to make the ends square. It's screwed from the inside to keep the outside clean. You can see how I've pre-drilled the holes for the remaining side slats on the opposite side. These screws on the inside are exposed (albeit only if you're looking in the box) so I used brass coloured screws.

The next time I assemble one of these crates, I would not only drill the holes in the corner bits before assembling the crate, but I would drill the holes for the long side slats at an angle so it's easier to screw them on.


Due to a miscalculation, I hadn't cut quite enough slats for the long sides, and by the time I finished I didn't want to bother cutting any more. Three is enough to hold the crate together and the contents in. One pair of screws is visible on the corner bits, but I don't particularly care. I also ended up with two extra 9" pieces, which were useful to have around for a future project.


I had intended, but forgot, to have the uppermost long side slats be raised by the width of a board, so that when these crates are stacked the bottom slats of the upper one are nestled into the side slats of the one below. I can do that for the next one to go under this one. It doesn't really make a difference for stacking my antique crate on top of this one.


Lade boards come in different widths and lengths, so if you're not trying to match the dimensions of a preexisting crate, you can play around with the sizes. You can see here that there's lots of room in all three dimensions to play around. Since the end pieces and the long bottom/side pieces are cut from the same board, you can make the box a bit narrower in one dimension to be wider in the other.
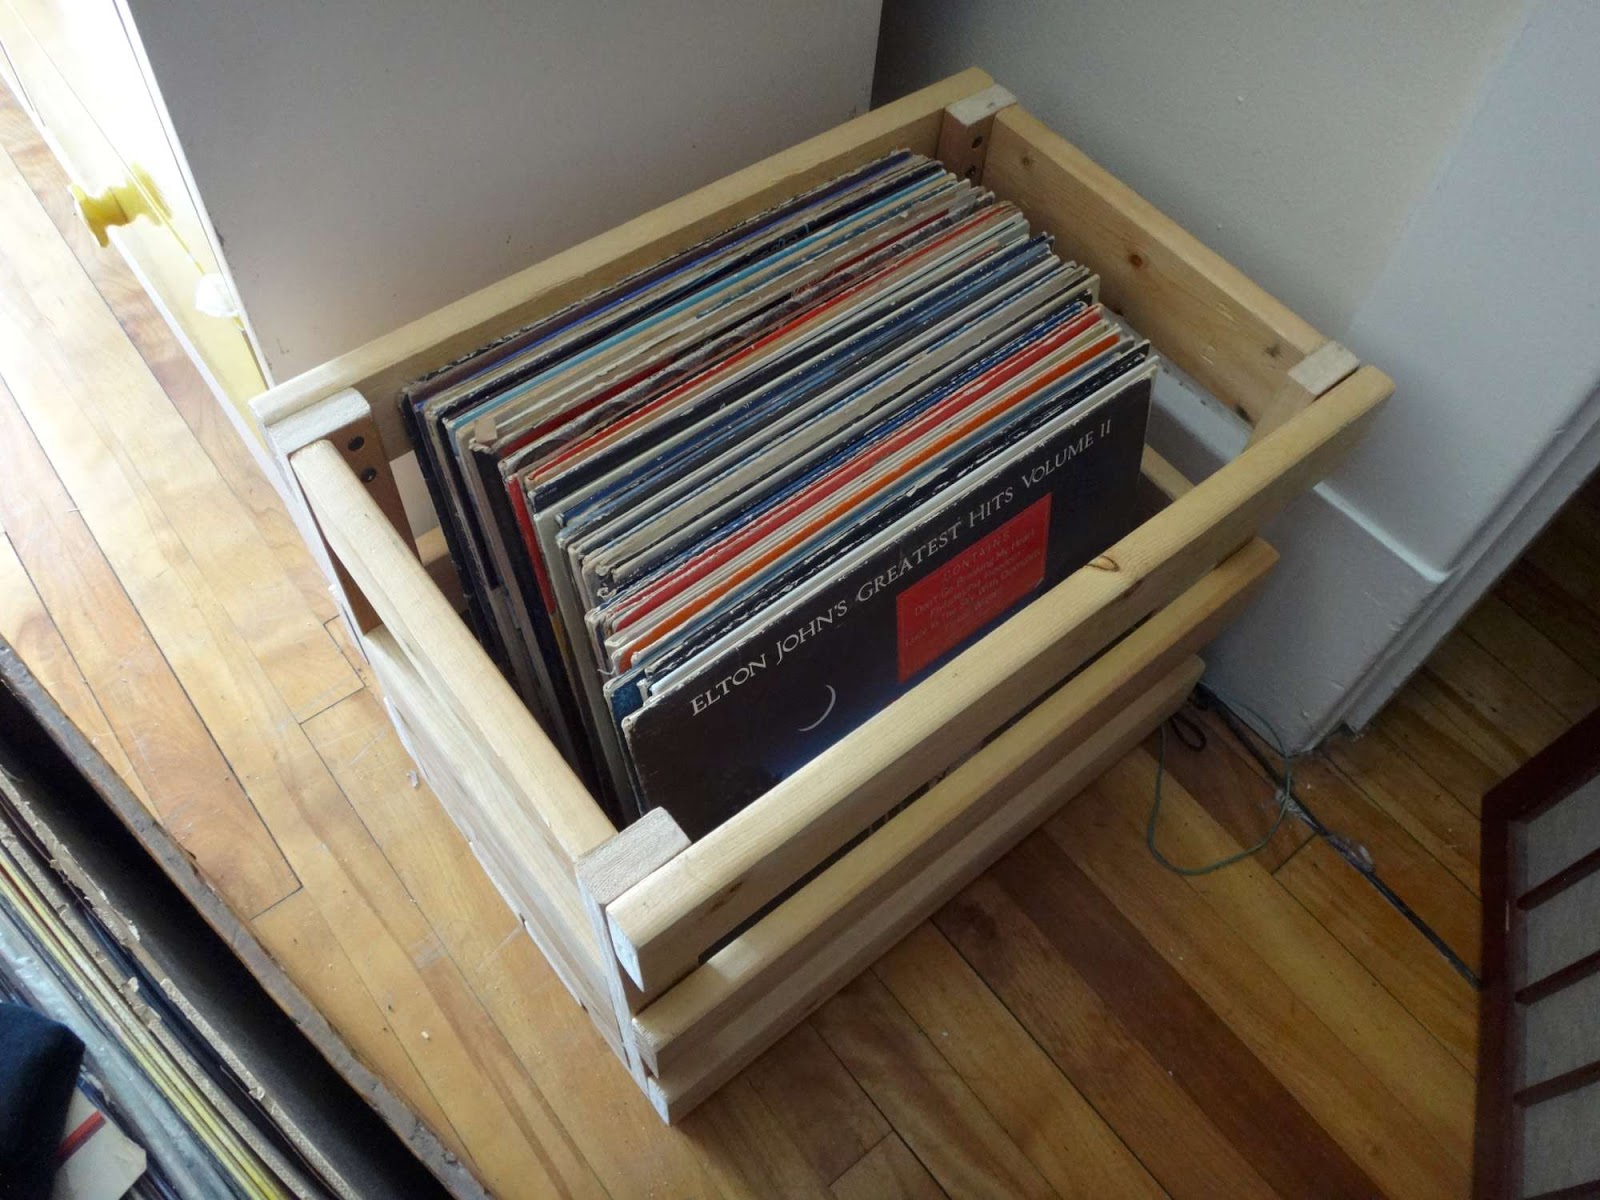

This is important for ensuring that the narrow dimension is a multiple of the width of the slats, so there are no gaps in the bottom. I hadn't factored that into my measurements and ended up having to put a thin board in the bottom because I had some gaps, which are a hazard when you're using the crate to carry narrow objects like record sleeves!


Nevertheless, I'm really happy with how this turned out. I could paint it, but this suits me fine since the boards have already been treated by our fine friends at IKEA (a store which I hope never to have the misfortune to visit in person as long as I can still find their products secondhand at the curb).

- RG>

Monday, January 18, 2016

RG's Workshop: The Vicetray (eventually... maybe...)

[Before I begin, I should note that as a Canadian, Wikipedia informs me that Canadians use the US spelling of "vise" instead of the UK spelling "vice", which was my first instinct. I've used "vise" throughout, except in the header where it makes a good pun on "icetray".]

Due to the limited amount of space in my kitchen, I stack my large dinner bowls on top of my dinner plates in the cupboard in order to conserve it. My bowls are heavy ceramic ones (nice ones, sturdy... I found them on the curbside ages ago along with some matching breakfast plates), so it requires a bit of effort when I want to grab a dinner plate out of the cupboard. If all five of the bowls are clean and put away, I have to actually take them out and put them down on an available surface (itself a challenge) and then get a plate, because the bowls are too heavy to lift with one hand (there are some other logistical difficulties involving contortions and stretching that also drive this requirement).

Lately, I've been toying with the idea of suspending the bowls above the plates somehow, allowing free access to the plates beneath. Unfortunately, the easy solution is off the table (or out of the cupboard). I can't simply put a table-like tray over the plates to hold the bolws, because there's not quite enough vertical clearance for that. Instead, I'll need to suspend the bowls slightly with some sort of cradle mechanism holding them from the sides, either from above or from below. This would allow just enough space for me to slide the plates underneath. How exactly this will work will take some thought.

Off I went to my workshop with the pile of plates and bowls to do some figuring and measuring.

On the way to the workshop (this is a trip taken on foot, I should mention, through two rooms. I don't have like a basement or giant shed full of power tools. My workshop is barely larger than a closet, and much less tidy), I stopped at the bedroom and put the plates and bowls down because I figured I should make sure there's a destination surface for them in the workshop.

Once in the workshop, I saw that my workbench was covered in sawdust from the last project, and various screws, bolts, and other knick-knacks that got relegated there from other parts of the house. Before brushing the sawdust off the workbench, I filed away the screws and bolts into the appropriate containers, tucked the bolt cutters back into their home, and started putting the hand tools back onto the pegboard.

My wire brush, however, didn't appear to have a home on the pegboard. In keeping with the mindset of the day, I figured I should make one. Usually I use coat hanger wire but I didn't have any scraps of that handy. What I did have, though, was a broken election sign metal stake, whose wire was the perfect thickness for pegboard holes, almost a quarter inch in diameter. I retrieved my bolt cutters from where I had just put them away, and cut off a chunk of wire.

If you've ever bent your own pegboard hook, you'll know that the end that goes into the pegboard has two nearly 90 degree bends very close together, maybe a quarter inch apart. If you've worked much with wire, you'll know that a quarter inch is ridiculously hard to bend accurately at such small distances with hand tools. I knew this, but tried anyway.

I was able to bend the end the tool hooks onto, but the pegboard end was stumping me. I have a wire-bending tool from Lee Valley, but the part of the wire I needed to grab on to was still to short.

I thought maybe it would work if I hammered a flathead screwdriver onto the wire with two things on either side of it, but that just resulted in other stuff jumping off my workbench from the hammering. I'd need a stronger tool. Hey, I've got a vise! I'll use that.

I got my vise out of its hiding spot, pushed aside anything I hadn't yet tidied off the workbench and swept away the sawdust to have a clean surface on which to put the vise.

My first choice of things to clamp the wire into was the cavity on my Lineman's pliers, the one opposite the space where the wire cutters are. But that just pushed the wrench open. Also it was too big.

I realized that my combination wrenches have a circular opening at one end and I had a variety of sizes to choose from. Using one of the pegs from the wire-bending set, I stuck the wire, the wrench, and the peg into the vise, and clamped. I was worried that the crimping on the wire would cause it to snap, but it bent perfectly!


While I was at it, I made a second pegboard hook too, since I had the right equipment out. I rearranged a few of the things on my pegboard, and somehow ended up using both of the newly-made hooks for other things. So I put the wire brush on a hook that was probably available before I started with all the wire-bending.

Never mind, that was done, I could continue with tidying the workbench to start working on the bowl thing. Oh, but the vise!

I keep the vise on the floor, under a shelving unit in a particular gap that isn't useful for much anything else than storing a vise. (In a proper workshop, I'd keep it mounted to the workbench) But vises being heavy, it's a struggle to push it underneath there, particularly without scratching the hardwood floor. I'd been thinking for a while about some sort of trolley mechanism to allow me to slide it in and out from under the gap so I would only have to lift it vertically.

My brain went crunching, and I sketched out a diagram of how that might work. A wheeled tray for something that heavy is bound to leave marks on the floor. But a drawer mechanism with a couple of flat boards should work nicely...

I went into my box of miscellaneous bits of furniture to find some rails and trays. The only flat style tray (which you mount sandwiched between the two flat surfaces) was a full-extension drawer mechanism, which I'd rather save for something else. But I did have the rails salvaged from a keyboard tray. Wrapped around the rails was a baggie with the four recessed mounting screws that came off whatever piece of curbside furniture I scrounged it from. Good foresight on my part, if I say so myself.

I found two boards of roughly similar size to try to mock it up on as a proof of concept. I didn't want to go to all the trouble of building the thing (and putting holes in the boards) if it wasn't going to function well.

The thing with keyboard trays, though, is that they aren't well suited to mocking up. They are mounted to the bottom of the moving part, and the stationary parts are mounted to the sides of the enclosed area, so I can't simply put the board on top of the rails and see how well it slides, because the bottom of the board is lower than the rails and rubs on the table. Not only that, but only one of the sides has an enclosed channel; the left side rail can come straight out (presumably to make it easier to install and adjust).

I found some short screws and hastily screwed the rails onto the moving board, without even bothering to drill holes for them. This wasn't enough; the channels also have to be mounted to something so the moving board can be suspended from it. I disassembled a set of blocks I had built for some other purpose that didn't work anymore to get two short boards from it and I screwed the channels onto them.

Still, though, I couldn't mock it up. I tried resting the two sides on the workbench and installing the moving board between them. I had to hold the sides together to keep the thing from falling off, but when I did that I squeezed it and couldn't tell if it was running smoothly.

I managed to find a piece of hardwood (scavenged from a 1970's government-issue wooden desk that my landlord left on the curb) which was the perfect width for the job, and with some metal L brackets and screws (also a curbside find), attached the sides to the hardwood bottom. Bending the L brackets slightly allowed me to 'fine tune' the adjustment of the rails, and it worked great!


Okay, so much for the mockup, but I realized that in trying to mock it up to see if the mechanism worked, I had actually built the thing. Unfortunately, I had not carefully considered the relative arrangement of the top and bottom pieces in so doing. They lined up nicely. Too nicely. My initial design had a support sticking out from the front end of the top piece so that the whole mechanism doesn't just tip over when fully extended with a heavy vise on top of it.

But then I realized that I could just screw on a small block to the front to achieve the same result (with a perfectly-sized block coming from the aforementioned disassembled previous project). Voilà, like so:


You'll note, however, that the top surface of the board is lower than the non-sliding channels, and the vise is wider than the top board. Luckily, the top board was scavenged from a discarded BEKVÄM kitchen cart, which, despite the one broken part on the one I found on the curb and disassembled for parts, has great birch components. More luckily, the BEKVÄM has two identical panels of this size. Without even screwing it on, I just rested the second piece on top and that worked perfectly. The top of the moving board was now higher than the non-moving parts.

Here's the tray resting in the gap under the storage unit:


I had to find a way to keep the whole thing from dragging out under the friction caused by the weight of the vise (and, let's be honest, a lazy alignment of the rails). I looked at the setup for a while, considered various complicated options including lining the base with bike innertube rubber or somehow attaching it to the legs of the storage unit, but then realized all I had to do was stick a hollow metal rod behind the storage unit's legs to hold the base back. I grabbed an appropriately sized rod from my container for long skinny things (which I built a couple years ago out of LADE bed boards, featured previously in the 90-minute glove rack):


All that was left was to put some felt padding on the base of the end that sticks out, so it doesn't scratch the floor. Not wanting to go to the trouble of getting my felt from my crafts bin in the closet (or, more specifically, having to put it away afterward) or figure out what kind of glue I'd need to adhere it to the wood (although in retrospect I think I have some self-adhesive furniture-bottom felt padding in my workbench drawer...), I instead used a scrap of old t-shirt cloth that I'd been using as a rag.

Even more lazily, when the twist tie I moved off the workbench in the initial round of tidying that I thought would be long enough turned out not to be, I just used some metal wire to hold the cloth on. Since the vise tray is going in the workshop, you know, it doesn't have to look pretty! (And immediately after putting the other tools away I found a different twist tie I had also moved aside in the initial round of tidying, which was, as I had suspected, long enough!)

Anyhow, here's the cloth padding on end of the upturned tray:


And final testing... just enough clearance. Works great! I thought about putting some sort of handle on the device to give me something to grab a hold of. I considered the four remaining loops from the bracket used in my bicycle handlebar clipboard mount, but couldn't think of a quick and easy way to attach it that didn't involve drilling (since it was now just past 10pm).

As it happens, the problem solved itself because I discovered that the vise happens to make for its own handle. Not bad, eh, for a contraption built without having to saw any wood and using only previously-scavenged items that I had lying around in my workshop?


Finally, with the vise tray built, I could start working on the plate thing! What was that again?

I put the stack of plates and bowls on the workbench, stared at it for a while, held some boards up next to it in various orientations, took a couple of measurements, made a rough sketch, and then put the dishes back in the kitchen cupboard.

I no longer have the energy to do that tonight. Maybe some other time when I'm trying to do some other project I can let myself get sidetracked into building the bowl cradle instead.

- RG>

Friday, August 23, 2013

On the economics of leftovers: it's probably better not to

At the end of dinner last night in a Chinese restaurant, there was the inevitable discussion about who will take home the leftovers.

As with other elements of bistromathics, this can be awkward, indeterminate, and occasionally testy. If not handled sensitively, everyone--including the person who takes the leftovers--can end up feeling worse off.

So for the question, "who takes home the leftovers," we are presented with a prisoner's-dilemma matrix of outcomes. Except the central assumption of the prisoner's dilemma is that everyone has the same goal: that a smaller prison sentence is better than a longer one. With leftovers, it isn't a given that each person will consider it to be a benefit to bring home more leftovers than fewer. For example, a vegetarian will not be interested if the leftovers contain meat. Or a monster.

At least the nature of Chinese restaurants simplifies the options by separating each dish into its own leftover container, so taking home a vegetarian dish doesn't necessitate taking home all the other dishes, including the meat ones. But it does add complications. With containerized leftovers, the question now must be broken down from "who takes the leftovers" to "who takes which leftovers?". In effect, the question gets multiplied by the number of dishes: "Who takes the chop suey," "who takes the fried rice," "who takes the fried tofu," "who takes the bird's nest?"

The other complicating factor is that some people would prefer not to take any leftovers home. So the question of "who takes home which leftovers" is further broken down into "who wants to take home which leftovers?"

The problem we encountered last night, despite being a small group with only one vegetarian, was that the vegetarian was interested in taking home the vegetarian dish, but nobody was particularly keen on taking home any of the rest. It eventually got narrowed down to whether I or another person was going to take home the non-vegetarian dishes. The other person had a regular lunch on Fridays, so they wouldn't be taking it in for lunch today. My fridge is generally where leftovers go to die.

So for both of us, the desire factor was low. We've already asked for it to be packaged, so somebody's got to take it. The question has at this point devolved again from "who wants to take home the remaining leftovers" (answer: nobody) to "to whom will the remaining leftovers be assigned for the purpose of being taken home?" In other words, who doesn't want them least?

Probability to the rescue!

I tend not to like labels, or categorizing things into black and white. Everything is probabilistic. Will I die tomorrow? I can't say no, but the probability is very, very low.

And one last assumption that had been hovering over the conversation was that whoever took the food home would eat it. So I offered up the fact that there's about a 50% chance of the leftovers being eaten if I took them home. I knew this and this was factoring it into my decision, but it was not known to the remainder of the group.

All of a sudden, this cemented the decision. My competitor for the leftovers didn't particularly want them, but if they brought them home the leftovers would get eaten (convenient, since this happened to also be the person who paid for the meal).

The central goal of leftovers is to not let the already-prepared food go to waste. A 100% chance that they will be eaten versus a 50% chance that they will be eaten makes the decision much easier.

Were it not for that, we might still be at the table wringing our wrists about who would take them home. At least we'd have something to eat.

- RG>

Saturday, April 13, 2013

If it weren't for Star Trek, I might not be yelling at my computer.

Because it's usually disguised as the present, it's easy to forget that we live in the future. Every now and then when I encounter a new unexpected piece of technology conveniently replacing a simple task, I'm momentarily reminded of this: Doors that open when you walk near them. Lights that turn on in a room when you walk into it. Locks are controlled by digital keypads. You can enter, use, and leave the washroom without touching anything but the toilet seat and the stream of water and soap. Many of these technologies have been around for a long time on an industrial scale, but they're now readily accessible on a consumer scale too.

And then, every now and then when the technology breaks down, I forget it again. It's easy to not contemplate the future when you're preoccupied with trying to simply open a door or turn on a light. Silly RG, they don't yell at technology in the future!

Other things from science fiction programs of yore are also available: modern PDAs, tablets and laptops far outpace anything Star Trek imagined in their respective form factors, and the combinations of things you can do with them have tremendous potential. Skype and FaceTime let you have live video conversations on demand with ease, and you don't have to have a console monkey in the room to put it up on the screen for you (I presume; I don't like user-facing webcams myself).

Even the famed communicator, which lets Captain Picard reach anyone he likes by tapping a button on his chest, is here: Apple iPhone 5 users have their very powerful and quasi-sentient "Siri". I don't use an iPhone, but I've had this function on my Blackberry for as long as I've owned one: I simply press and hold the button on my headset and tell it a phone number or the name of one of my contacts. My old Nokia brick phone prior to that even let me record up to 20 sound bites to associate with voice-dialing contacts.

I even rented a car recently which didn't have a key. There was just a fob I had to carry around, and the car knew I was near it and unlocked the doors for me. It knew I was inside the car to enable the "start" button that I pressed to start the ignition. These features were so unexpected they had to be explained to me by the clerk, and it took me even longer to figure out how to turn the lights on once it got dark, long after I'd left the lot. (It'll be interesting to see scrap heaps ten years from now filled with cars where 99% of the electronics and machinery still work but an out-of-production patent-protected fingernail-size part prevents the computer from letting you turn on the steering wheel.)

But science fiction's impact on our relationship with technology does more than just drive new ideas and foster automated convenience. I think it also drives our frustrations with technology, too.

Think about it. When you think about technology on the Enterprise, you think about how it works, right? What about when it doesn't work?

There are plenty of examples of futuristic technology not working on TV, sure. But when it does break, you usually know why (even if the character might not). If the cause is not something obvious like a catastrophic power loss, it's usually something nefarious. Someone has locked a control panel, or a villain has short-circuited the turbolift, or Moriarty has reprogrammed the holodeck. Sometimes there's some energy-based lifeforce that's screwing with all the systems in the ship that only creates the subtlest of symptoms. And even then, the characters usually have a workaround readily available, because unlike your journey through the doorway, the TV plot must go on.

How often have you watched science fiction and something went wrong for unknown, unexplained, and relatively benign reasons? In other words, because it simply isn't working properly? Not often, I'd say. There's no such thing as an idiopathic TV tech malfunction; everything happens for a reason—usually a malicious reason—and if you don't know already what that reason is when the character encounters the problem, you'll probably find out by the end of the episode.

So then think about your own experiences with technology. I, for one, couldn't tell you how many times in a week I go to do something with a computer, or my phone, or some other gadget, and it refuses to behave itself. I know how it's supposed to work and I've gotten it to work a hundred times before, but it won't do it this time. I spend hours trying to figure out what the problem is, trying workarounds, reinstalling things, only to eventually give up.

It still has power and is configured the same as when I last used it. It's responding to all my other commands. But it's not doing this one thing that I want it to do now. There must be a reason for the holdup, a malicious force at play, I just haven't figured out what force that is. I know there must be something because that's what I'm trained to believe by years of watching science fiction TV. Well, nobody else has been using my computer, and there are no supernatural forces at play.

Therefore it's the computer itself that must be the malicious actor trying to keep me from doing what I want. Occasionally one can blame the manufacturer or software designer, but neither of them are in the room and it's hard to curse at someone when you don't know their name. It's convenient enough, on the other hand, to blame the computer. All the other variables are controlled, which leaves the computer as the only thing that can change what's happening with my computer.

So after a frustrating few hours, wasted, trying to get my futuristic gadgets to perform my benign chores, I forget that we "live in the future". I forget that breakdowns of technology are only malicious on TV for plot reasons.

And I forget that people in the future don't yell at their computers.

- RG>

Monday, December 31, 2012

RG's Workshop: Mega fridge magnet (or: keeping up with the Scrimshaws)

At last, some spare time in which to catch up on some overdue blog posts about stuff I've built...

So a couple years back, David Scrimshaw shared an idea of his to use the large magnets from old speaker cabinets as fridge magnets for holding drill bits.

Not long after this, I used a similar principle to make a fridge decoration, only I used the sleeve from a discarded baby shirt and tied the ends to make it look a bit like a giant cloth peppermint wrapper. I failed to take a photo of this, and I must have given it away because I can no longer find it on my fridge.

But the curbside has since yielded more speakers, including a very large pair of cabinets earlier this year. I dismantled the cabinets and extracted just the speakers to bring them home (I also kept the screws that held them in, which were also of very good quality).

To power a big speaker, you need a big magnet. Here it is on my fridge, with a Kryptonite U-lock for scale:


It also holds tools, such as a hammer, chisel, wrench, screwdriver, and pliers:


I needed the U-lock back on my bike, but decorated it otherwise with tools and binder clips.


Tools, and a magnetic clip on the woodsaw which is holding a fortune cookie slip that reads, naturally, "others are drawn to your magnetic personality."

- RG>

Friday, September 07, 2012

RG's workshop: Stereo system switchboard

It's been a while since I wrote anything on here, and even longer since I blogged about anything interesting. (Oh crap, I hate it when people start off their blog posts talking about how long it's been since they last blogged. You know what? Strike that first sentence. Let's try at this again.)

I have a relatively small apartment, though it is big enough for me and my stuff. It has enough rooms, including one I use as my workshop.

In the living room of my apartment, I have a stereo system. That is to say, there's a stereo device I found on the curb somewhere, through which I route the audio that accompanies the projector screen (among other uses).

The stereo has two sources of external input, not including the radio/CD/cassette stuff built into it. These inputs consist of one end of an audio cable being plugged into the stereo unit's "AUX INPUT" jack, and the other end of the cable split, one path plugged into the turntable in the bedroom, the other connected to a long cable with a standard mini jack. I can plug the mini jack into my laptop or my Blackberry, and the cable is long enough--and my apartment small enough--that I can bring either device into any room of the house to 'remotely' control the audio.

So for example, I can watch online TV in the kitchen with my laptop on the kitchen table and the audio going through the soundsystem back out to the speakers in the kitchen. I can also use my new Blackberry's FM tuner to listen to the radio (I only started listening to the radio again when I got the new Blackberry last week, and I've thus far tended to listen to the station that has all the ads for hearing aids and funeral service providers). The Blackberry (as with the iPod I briefly owned) needs you to plug in the headphones to listen to the radio, because they act like the antenna, but the stereo jack works just as well.


Anyhow, the stereo sits under this desk which I did not find on the curb. I built it with my own two hands, and a screwdriver and hammer, according to the assembly instructions from the non-Swedish office supply store where I had bought it.

The stereo sits under the desk as does one pair of speakers.

Another pair of speakers goes into the kitchen (which can extend into the bathroom if and when I see fit to have them do so), and as of very recently, a third pair is wired through the wall into the bedroom (which I can extend into the workshop, should I see fit to do that also).

The thing is, I do not want all of the speakers to always be on. I only need the sound in the room(s) which I am occupying. So I need a switch system.

I bought a basic audio switchbox from Radio Shack ("the Source" in modern parlance), which didn't really work. Even after I fixed some bad soldering inside it, there were issues with bleeding between the left and right channels. I also couldn't separately activate the left and right units of a pair of speakers.

So I stuck with my previous scheme of a pair of Y adapters on the stereo output cables and plugged or unplugged the Y ends into the ends of the cables for the desired speakers, all of which I have patched into RCA jacks. I had had the jacks stuffed into the grooves of the CD holder under the desk top (circled in the above photo).


But this did not satisfy me. Functionally, it was not an elegant solution to have cables sticking through a grille. So I decided to build a switchboard (you digital-age kids might not know what a manual switchboard is, but they work very nicely).

The first step was to build a panel that would fit into the space where the grille is. The grille is wedged between two columns that have holes corresponding to bumps on the edge of the plastic grille.

I first bent some paperclips into latches that I inserted into the edge of the thin plywood board at the same intervals as the bumps on the grille. There is a recess underneath them, which allows them to dip out of the way and spring back up to latch the board into place (like on a door). They are tapered so that when you push the board up, they are pushed by the edge of the hole in the cylinder into the recess in the board, releasing the board.

I'd seen this trick done online somewhere months or years ago, but don't remember where. It was probably from a project documented by Rob Cockerham or Matthias Wandel.

Anyhow, it works, and I can put the board into the space, and remove it when I need to by pushing up to release the latches.

The next step was to cut holes for the RCA jacks on the ends of the speaker wires. I needed to get the jack through the board, but I also wanted it to be snug so I could push the Y connector into it without the plug just falling through the board.

To accomplish this, I settled on a keyhole-type shape, with two round holes connected by a channel. One hole was larger than the RCA jack, allowing me to stick it through, and the other was slightly smaller, allowing it to be held snug. The holes were connected by a channel that is wide enough for the cable to pass through. (on the right below is my first attempt, which used a hole that was too small)

After cutting the holes for the four stets of speakers (kitchen, living room, bedroom, and a spare set of holes for future expansion), I painted it black to match the piece of the desk it was replacing. The only black paint I had were a couple of cans of spray paint I found one bountiful day of treasure hunting (a.k.a. curb shopping, dumpster diving, etc.):

My only previous experience using spray paint was indoors, and resulted in everything in the room, including plenty of electronics, being covered with a yellow dust. Thankfully, this room was in somebody else's house, and the electronics were theirs, as was the bright idea of spray painting indoors.

To alleviate this problem, I taped together some newspaper pages into a cube, put the board inside, reached in with the can of spray paint and sprayed it as best as I could with the cube closed. I let the dust settle a bit and reapplied the parts that I missed (the cube filled with spray dust, completely obscuring the workpiece so you couldn't see if you had gotten it all).

The paint job worked well enough for me, for something that would most of the time be in the shadows under the desk top anyway.

The only remaining issue was that the jacks sometimes pulled out of the board when disconnecting the switch cables. This was fixed with that quintessential desktop accessory, the trusty binder clip.

Normally at this point in the blog post I'd go back and review it to make sure it makes sense and doesn't drone on too long, but I'm too tired and I might forget to come back to it if I leave it to another day.

I've built (and photographed the construction of) other things since I last blogged, and I'll maybe hopefully eventually probably get around to blogging those also.

- RG>

Monday, February 06, 2012

Here's to 1000 more years!

I've been using the moniker RealGrouchy online since at least 2003, and I didn't get the gmail account until 2005, but I consider the real RealGrouchy epoch to be when I started contributing to the interweboscape. This would be when I started contributing on Wikipedia, and that first contribution was on February 6, 2004, exactly eight years ago.

Eight years is scary. XKCD comic 647 scary:

Back then, Wikipedia only had a quarter million articles in English, whereas now it's approaching four million.

I first learned about Wikipedia from an article in the Ottawa Citizen the day before. The article talks about how user-generated content engenders community, and other fine stuff that made me think "wow, this is cool! I want to do this!"

I distinctly remember reading a similar article in the Citizen's Technology section a few months later that inspired me to start blogging, though I can't find it. I remember it talking about the "local blogging community", and I remember trying to find this "local blogging community". In what looks mighty foolish in retrospect, I did this by looking for other Blogger accounts that mentioned "Ottawa" in their location in the profile, and following their blogs. There was nothing particularly interesting.

I'd been writing Letters to the Editor in the Citizen for a few years, but over time the number of things printed in the paper that I wanted to write in and bitch about grew to a point where I knew most of them wouldn't be printed in order to leave space for others. Still wanting to share these opinions, I started my blog intending to publish my objections there instead.

I don't think that worked so well, because the first few years of my blog posts were mostly about how little I was doing. Some were specifically empty, because I didn't realize at the time that you could back-date posts (or maybe you couldn't yet... I remember tagging didn't come along for another couple of years) and I wanted to have a few entries I could write over for more reference-style posts (which I never bothered to do, and now "pages" lets you do that, which I haven't used either).

I know it sounds ironic, a person with the handle RealGrouchy going out in search of community, but there are rationalizations that I'll leave you to hypothesize. I'd picked the name some time prior as a handle for some online game, since RealGrouchy was one that was easily available (who would ever want to call themselves that!?).

Through it all, I have written primarily for myself, in what I can imagine is sometimes agonizing detail for my readers (but details I nevertheless want to record for my own reference). When I have written for others, it is primarily so they can see how wonderfully awesome I am. I have also written about other year-increment milestones, such as my McDonald's Fiveniversary (still going strong), and my annual holiday posts on topics like Earth Hour and National Grouch Day.

I've gotten a lot more busy in meatspace, doing things that I prefer to keep separate from here. But around me has grown a local blogging community, and some weeks I write more in the comments of others' blogs than I do in posts on my own. The persona of RealGrouchy grew, largely in the few years I spent on the XKCD forums, starting as user number 48 on the forums, becoming a moderator, and gaining celebrity—and, following my retirement, legendary—status on a site that has had nearly 300,000 user registrations.

But the more things change, the more things stay the same: I don't write so much about local issues as I'd originally planned, and instead write about stuff I've done or made with little reference to the outside world. I do still bitch about stuff, though I've developed a more subtle way of doing it. Not to mention more socially productive ways. I've also thought up many large projects that I never finished, and some I never even started.

I'm proud that I did all this—with a couple rare exceptions that I try not to acknowledge—anonymously. I wanted to link to a blog post picking apart Ken Gray's assault on anonymous bloggers, but I see that I never finished and published it. The gist of it is that he's a bigger coward despite using his real name than I am because I use a pseudonym. I've accomplished all this, made friends (many of whom I've subsequently met), been appointed to positions of power, and earned respect for my opinions, all without most of those people knowing what my name is. They know who I am, insofar as I present myself as RealGrouchy, and the identity of RealGrouchy is as strong as if I'd used my own name (and perhaps even stronger).

I knew from the start that I wanted to be anonymous. I didn't have any particular reason to do so at the time, but I knew that if a good reason were to come along, I'd be unable to put the cat back in the bag. However, it has worked well. It is great at making you think twice before putting something in writing, because you have to think about whether a particular detail will give you away, or if you'll be unable to say something with your real name after you say it with the pseudonym. The challenge of walking this line can be fun.

At the same time that writing under a pseudonym helps with restraint, it is also liberating, because I can say things that would be out of character for me, but are entirely in character for RealGrouchy. There are plenty of people who know RealGrouchy and have met the man behind him (and I thank them for keeping them separate). But for others, when you write as "RealGrouchy," they expect you to sound angry, and don't react as harshly when you are. After enough correspondence that people get to know RealGrouchy, it's nice to hear people say "you're not all that grouchy after all," because generally, mentally healthy people aren't all that grouchy.

So there you have it. Eight years of RealGrouchy. Here's to the next binary millenium!

- RG>
Friday, January 27, 2012

Whoring myself out some more

Despite being on Twitter now (as @RealGrouchy, of course), I still have very few followers, and don't really have much going on there.

I guess that's really a success, since I don't particularly care for being social.

Nevertheless, I am self-conscious--and to an extent, competitive--and having so few followers doesn't jive with my business plan:
1. Get lots of Twitter followers
2. ???
3. Profit
With so few followers on Twitter, I feel I need to do something to compensate.

So I've put a Twitter feed in the sidebar of the blog.

Watch me be a twit.

- RG>

Other things washed away by the weather

I distinctly remember posting--or at least drafting--the annual réprise of my Waterlude logo a couple of weeks ago. I remember searching Google for "Waterlude" and finding that post being the second result (strangely, now third), after a MetroOttawa article using the same Napoleon reference on the same day as my blog post.

Still, my picture-perfect "Waterlude" sendup of the "Winterlude" logo is from a year prior. (And is still the first Google Images search result for "Waterlude")

I also remember that when I drafted the post, either the canal hadn't opened yet, or it had just opened, and because of this, I was having second thoughts about the timing of such a post. But I don't remember deleting it...

My best guess is that I did post it, but that the rain and mild weather melted it away. What tragic irony.

- RG>

Wednesday, December 28, 2011

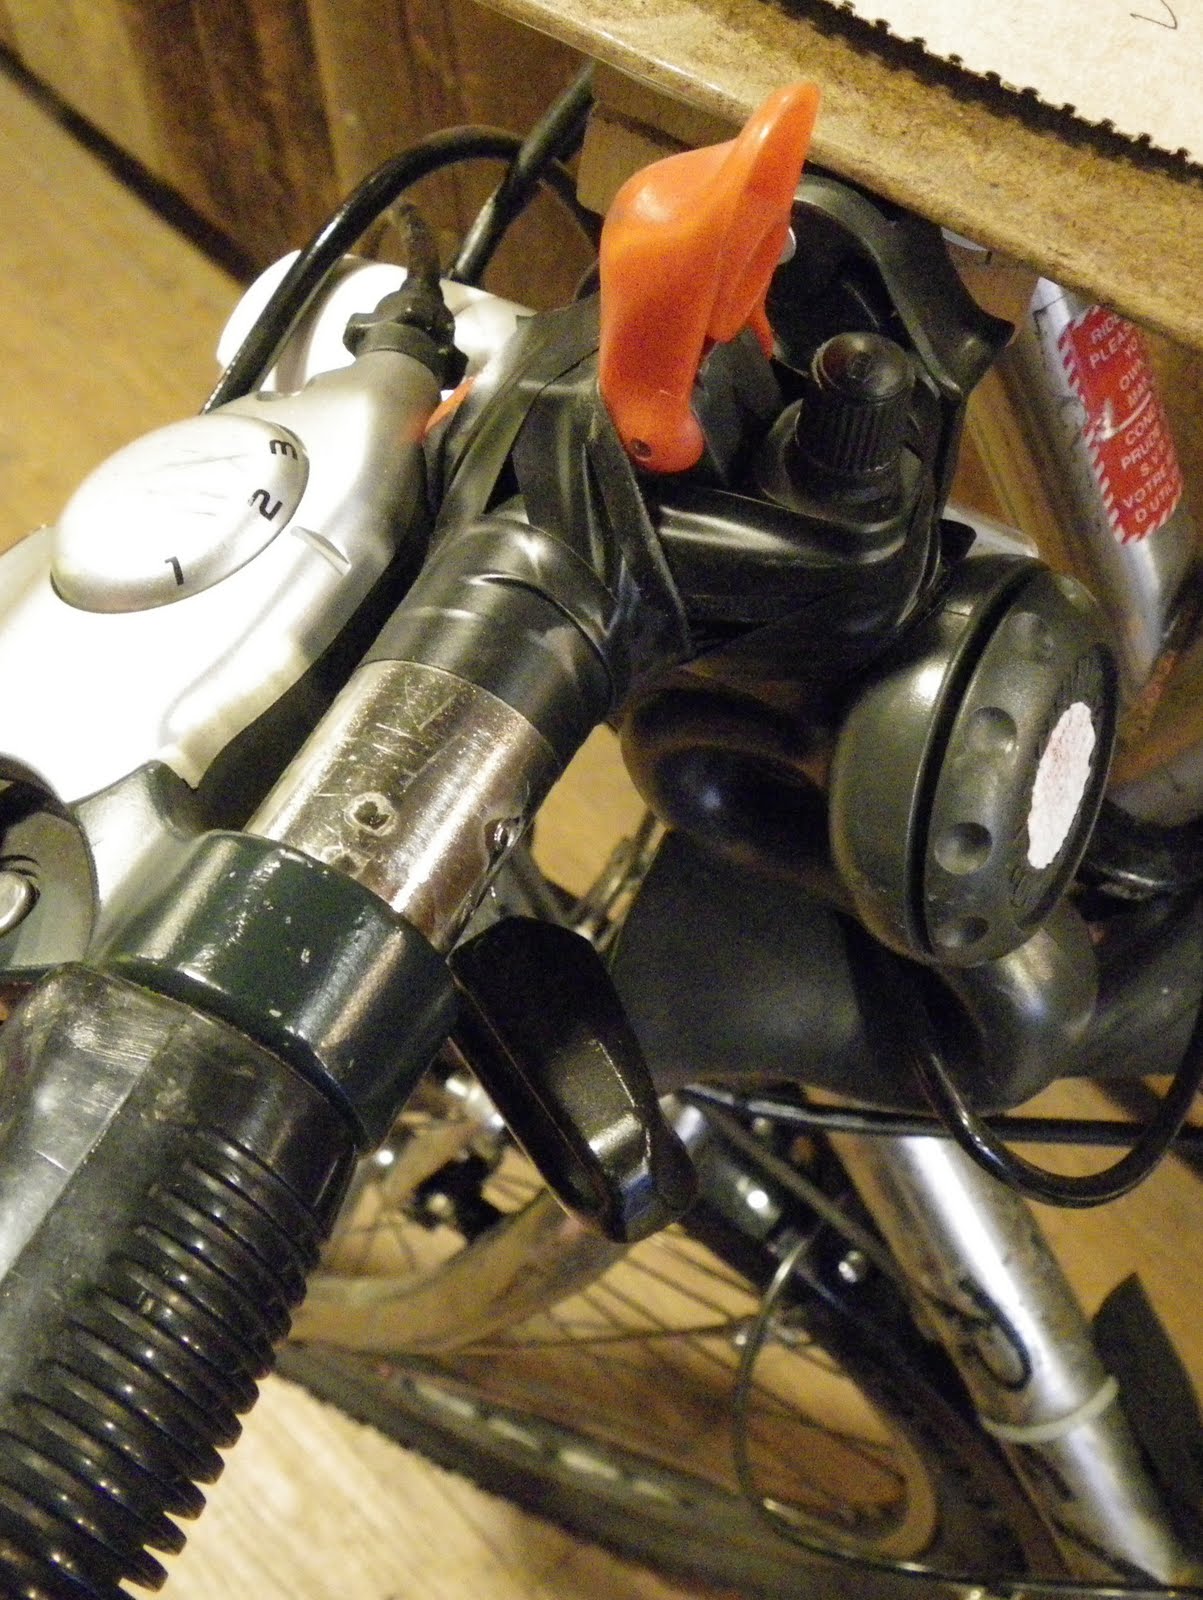
Bike tip: Safely stowing the air horn

You know how annoying it is to work on your bike and accidentally set off the air horn? Bike mechanics like it even less because it's not even their bike. Many mechanics ask you to disarm your air horn before bringing it in. This has the unfortunate consequence of needing to remember to reinflate the reservoir before leaving the shop.

So do this:

A simple Shraeder valve cap will stick on top of your AirZounds air horn. It doesn't actually screw on, but when you push the button back down, it can't activate the horn, and the cap doesn't fall out.

Your greasemonkey can safely operate on your bike while you can ride home knowing you can scare the shit out of any pedestrian who walks into the street without looking first.

- RG>

Sunday, October 02, 2011

Pink irony

There were a few articles in the news lately about "pinkwashing": slapping a pink Breast Cancer Awareness Month ribbon on a product to make it sell better. One story in the Ottawa Citizen, Pink Fatigue describes the difficulty some groups face with the many caveats placed on the amounts given in these campaigns, and that money needs to go towards prevention, not just treatment. It's a controversial topic that I won't wade into too deeply.

Except to post this photo of the same issue covered last year.

I wonder if there was any effect on Telus' "Go Pink" campaign after the ad was placed right next to an article decrying just those types of ads!

- RG>

Sunday, September 18, 2011

Coffeeshop toilet humour

At the coffeeshop the other day, the two people at the next table got to talking about "best before" dates and food safety. I, of course, pretended I wasn't listening to them as I did stuff on my computer, while listening to the interesting bits of the conversation, which was essentially all of it.

One point that stuck out was along the lines of "just because it says 'best before' doesn't mean it's 'worst after'". In other words, food isn't necessarily bad past the expiry date, just not at its best. Yogourt, for example, can last for months.

The man went on to talk about how eating food after the best before date is about making an informed decision. Unless there's a flaw in the manufacturing process, he posited, anything you can get from food (aside from meat) that isn't obviously spoiled isn't going to be very dangerous. Or as he put it, "at my age, I can afford to spend an extra 25 minutes on the toilet if I end up eating something that's a little off." I grinned behind my hand, on which my chin was resting.

The conversation continued to spiral downhill from there, still with me pretending that I didn't have an ear on them. Eventually the woman leaned over to me and said "you're going to have quite the stories to tell your friends about what you overheard today, aren't you?"

I did not miss a beat. I replied drily, "oh, I've got a laptop. I can sit on the toilet all day if I have to!"

A few minutes later, she stopped laughing.

- RG>

Thursday, July 21, 2011

Beat the heat with RG's Purple Slush Drink

It's possible that you don't live in Ottawa, or you're reading this in December, or you're one of those people who goes from their air-conditioned house to their air-conditioned garage to their air-conditioned car to their air-conditioned office garage to their air-conditioned office (in which case, that's real weak). Otherwise, you'll likely know that it's fucking hot outside, like 37 degrees not counting the humidex.

During the previous heat wave, I had run out of my soft drink of choice, and either it was too late or hot or I was too lazy to go to Bridgehead for my favourite slush-based drink. It occurred to me that I had purple stuff mix of a certain vintage, allowing me to make the next best thing.

Here's what you need:

  • Drink Mix (can be Gatorade powder or sugary drink mix or try out something else--on a per-drink basis the stuff is dirt cheap)
  • Blender
  • Mason Jar, or County Fair Drinking Jar (with screw top)--I've seen them at Canadian Tire
  • Ice
  • straw (at least 0.5cm diameter; not pictured)
The amount of ice I used in this sample was not enough. It should come loosely to the shoulder of the jar, or about 3/4 full. Too much and there's no room for it to blend; too little and the drink is too watery.

Add the Purple Stuff mix (2 heaping tablespoons tingles my sweet tooth just right, though you might want less)

Add water to the shoulder of the jar. Again, this is a bit too low. You might want to put the water in first to make sure the mix doesn't stick to the bottom.

Unscrew the bottom of the blender jug and reattach it to the jar. This makes for one less thing to have to clean afterwards. Don't tighten it too much! If you do, it is a bitch to unscrew it. The rubber seal works well.

Put the jar with the blender attachment on the blender. Yes, it feels weird turning a container full of drink upside down. Get over it.

Once again, this doesn't have nearly enough inside to blend properly. Here's one I did during the last heat wave that blended much better:

I had to add more water to this one, which made for a poor ice-to-water ratio. This shouldn't have layers like this; it should be more homogeneous.

Either way, it's an iced drink, and if you used Gatorade powder, it has electrolytes too. Pop a straw in and drink! Drink it without a straw at your own risk!

So there you go. It's easy, cheap, and fast.

Unless, I guess, you don't have a blender or a compatible jar or glass. In that case, you'll probably have to buy air conditioning, which is probably not easy, cheap, or fast.

- RG>

Saturday, July 02, 2011

RG's Workshop: RG's Laptop Box

Last year, I bought a new laptop after the audio jack was irreparably damaged on my previous one from being bumped around in my bike panniers too much. (The one before that got a broken screen from the same thing)

Since I didn't want yet another laptop to start breaking up on me, I'd known before I even bought my current laptop that I wanted to build a box for it. So within days of receiving my laptop, I built myself a box, custom-sized for my brand new laptop:

I'd spent the previous few weeks keeping an eye out in trash piles for just the right type of particle board to use. I didn't want it to be too thick, but I wanted it to be strong enough to sit on. You see, the benches at Bridgehead are a couple too inches to comfortably use for typing or writing, and I'd wanted to build myself a laptop box to serve this alternate purpose. Knowing I'd be buying a new laptop soon, with different dimensions, I had to wait until I'd bought (and received) the new one. The old laptop was already busted, so why bother trying to protect it with a box?

I didn't take any photos of the initial construction, but it was almost entirely used materials, including these antique hinges from a cabinet door somebody was throwing out. The side pieces were cut from IKEA Lade bed boards (featured in the 90-minute glove rack) sliced down the middle. While attractive, functional, and perfectly sized, the hinges were a bit loose, especially since they were going in the end of the particle board. I glued the screws in to keep them tight:

The finish on the board I'd chosen had some water damage in some places and was peeling, but there was enough undamaged wood to use for the box.

This was a feature, not a bug, as I was able to use it to veneer the ends of the side boards.

The box was quite oversized for my panniers, threatening to rip them open, but inspiring further creativity in its repair (my 15" screen was a size or two too big with the box wrapped around it).

To economize on space, I cut a notch out of one of the side boards for the laptop's protruding battery case to slim down the box's profile. I also, unfortunately, had to angle the top ends of the side boards, cutting off the DIY veneer in the process. You'll also notice a little metal plug next to this notch (the kind used for adjustable shelving units), which keeps the top aligned and thus solves the loose hing e problem.

In addition to a laptop protective box and a booster seat, the box serves many other purposes. It provides a hard flat surface to rest your drink when lounging on a couch, a writing surface, and, shown here, a laptop lifter to bring the screen to a more comfortable viewing height when, say, watching videos of the masturbating Santa Claus:

A few months later, I calculated that a well-placed 1/2" hole...

...lets me plug in the laptop to charge it while still in its box.

It's the laptop box!

Want your own? Want the plans? Too bad. Figure it out and make your own fucking box!

- RG>